hero-bg-pricing

Get your team started in minutes

Sign up with your work email for seamless collaboration.

Git Workflow Diagram Explained for Developers
Technical Diagramming

Git Workflow Diagram Explained for Developers

Author
Cloudairy
By Cloudairy Team
January 10, 2026
10 min read

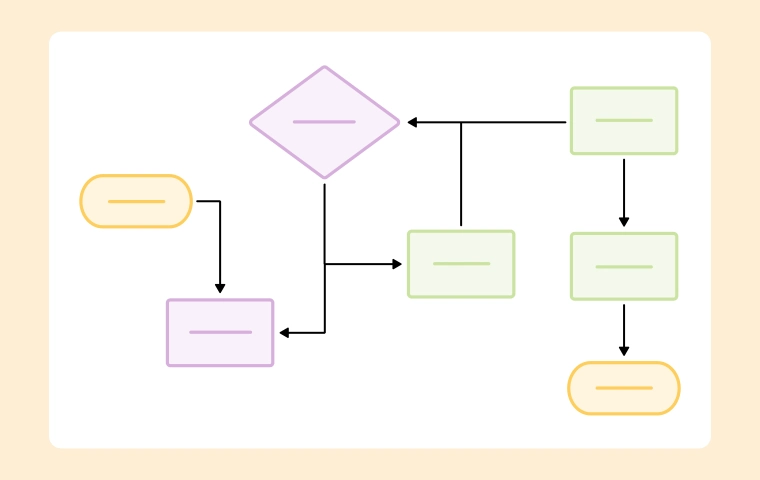
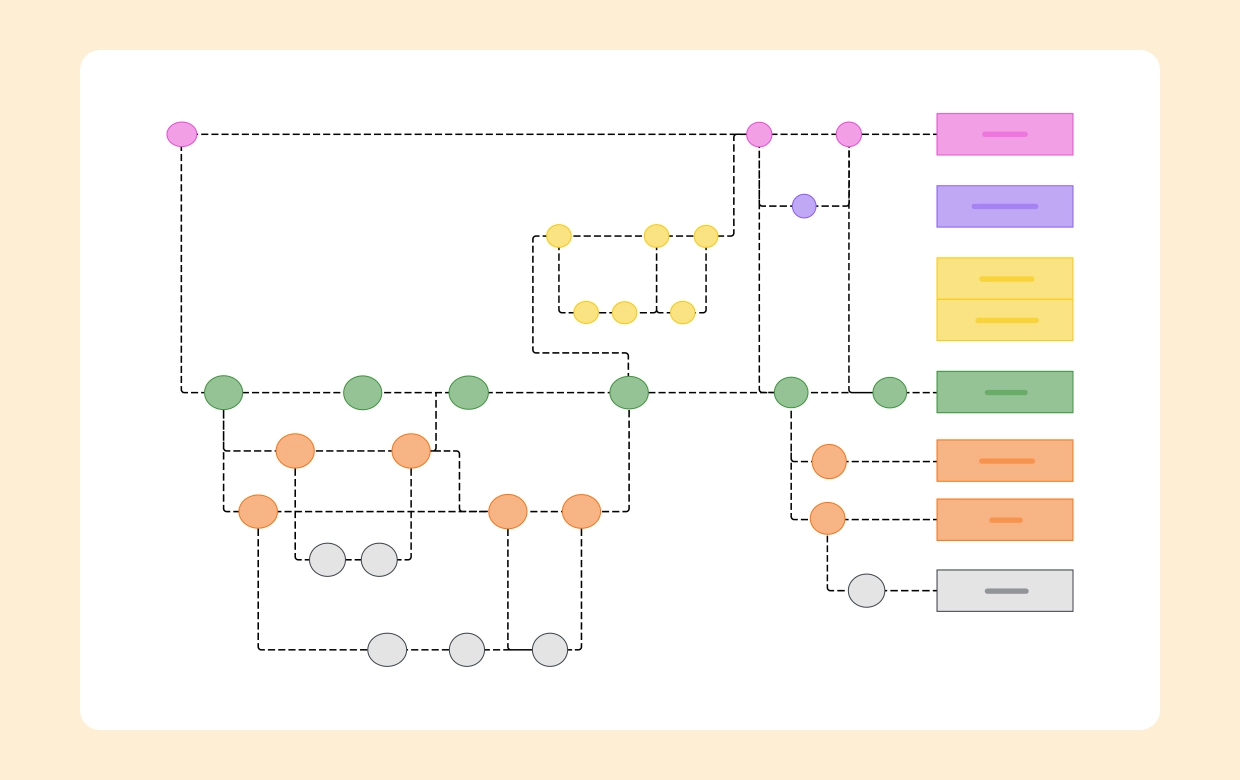
A Git workflow diagram visualizes how code moves across branches, reviews, and releases. It clarifies contributor roles, merge policies, and CI/CD gates, so teams ship faster with fewer conflicts.
Instead of relying on tribal knowledge, your branching model becomes a living map that aligns developers, QA, and DevOps on a single, reliable delivery path.

Build one instantly with the Git Workflow Diagram Template or map end-to-end release logic in the Workflow & Process Diagram Maker. For foundations, see the Workflow & Process Diagrams Guide.

Why a Git Workflow Diagram Matters

Diagrams make branching rules explicit and testable. They show how features graduate through environments, where reviews occur, and what triggers builds or promotions.
This reduces merge debt, standardizes handoffs, and sets expectations for hotfixes during release crunches—especially in distributed or hybrid teams.

Core wins:

  • Fewer surprises: Everyone knows where code goes next and which checks must pass before merging.
  • Faster onboarding: New devs understand the branching strategy on day one rather than reverse-engineering it.
  • Safer releases: Clear hotfix, rollback, and release procedures minimize production risk.

Common Git Workflow Models (with Diagrams)

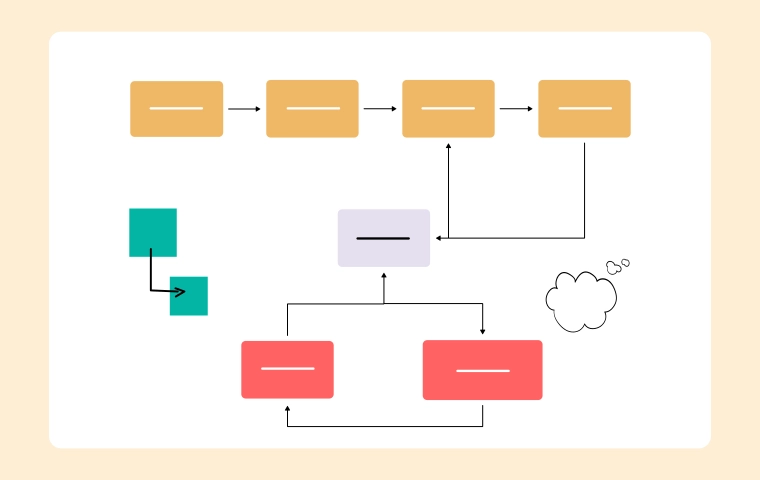
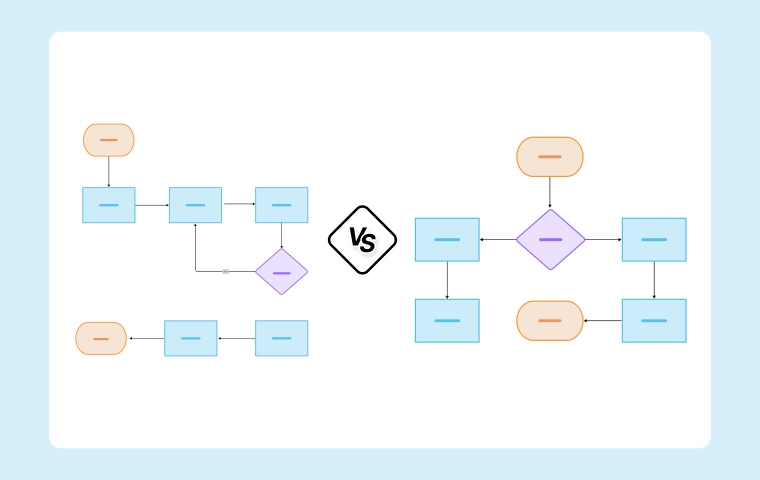
Each model trades off speed, control, and complexity. Choose what fits product cadence, compliance, and team size.

1) Git Flow

A structured model with main, develop, feature/*, release/*, and hotfix/*. Great for versioned products and formal releases.

  • Pros: Clear release hygiene; isolates stabilization; predictable tags and change logs.
  • Cons: Heavier branching; longer-lived code paths; more rebasing overhead for small teams.

2) GitHub Flow

Lightweight model with main as deployable and short-lived feature branches via PRs. Ideal for continuous delivery.

  • Pros: Simple mental model; rapid iteration; easy automation of checks.
  • Cons: Less buffer for large releases; needs strong CI and disciplined feature flags.

3) Trunk-Based Development

Developers commit to main (or trunk) frequently with tiny branches merged daily. Suits high-velocity teams and progressive delivery.

  • Pros: Minimal divergence; fast feedback; reduced merge conflicts.
  • Cons: Requires robust tests, gating, and feature flagging to keep trunk releasable.

Diagram any of these with the Git Workflow Diagram Template.

Git Workflow Diagram Template

When to Use Which Model

Match the model to your delivery needs, regulatory context, and team maturity.

  • Git Flow: Regulated environments, on-prem releases, mobile apps with store submissions, or monthly/quarterly drops.
  • GitHub Flow: Web products, microservices with frequent deploys, strong CI/CD, and feature flag infrastructure.
  • Trunk-Based: Platform teams, infra tools, or services requiring daily deploys and fast rollback paths.

How to Create Your Git Workflow Diagram (Step-by-Step)

  1. Define release cadence: Weekly, continuous, or milestone-based determines your branching depth and naming.
  2. Select branch roles: Decide which branches are deployable and which are transient (feature, hotfix, release).
  3. Map gates and checks: Add PR reviews, test suites, security scans, and manual approvals as icons on the flow.
  4. Model environments: Show dev → staging → prod with promotion rules and artifact provenance.
  5. Add hotfix path: Draw a fast lane to production with cherry-pick or merge-back rules to keep histories aligned.

Start fast with the Workflow & Process Diagram Maker.

Best Practices for Maintainable Branching

  • Keep branches short-lived: Merge daily or behind feature flags to avoid painful divergence and rebase storms.
  • Automate everything critical: CI tests, semantic versioning, changelog generation, and protection rules on deployable branches.
  • Tag releases consistently: Use semantic versions; diagrams where tags are created and how they trace to artifacts.
  • Document PR policies: Required reviewers, DCO/sign-off, and minimum checks should be visible on the diagram.
  • Close the loop: Always merge hotfixes and release changes back to the integration branch to prevent code drift.

Pitfalls to Avoid

  • Snowflake branches: Ad-hoc naming breeds confusion; standardize prefixes and lifecycles.
  • Long stabilization phases: The longer code waits, the harder merges get; prefer incremental hardening.
  • Environment skew: If staging ≠ prod, diagrams lie; align configs and infrastructure or annotate differences.
  • Invisible gates: If security scans or compliance checks aren’t on the diagram, teams will forget them.

Example Scenarios

  • SaaS with daily deploys: GitHub Flow with PR checks, canary deploys, and flags to dark-launch features safely.
  • Mobile app releases: Git Flow with release/* to freeze features, run beta testing, and tag store submissions.
  • Platform team: Trunk-Based with protected main, fast rollbacks, and heavy automated test matrices.

Conclusion

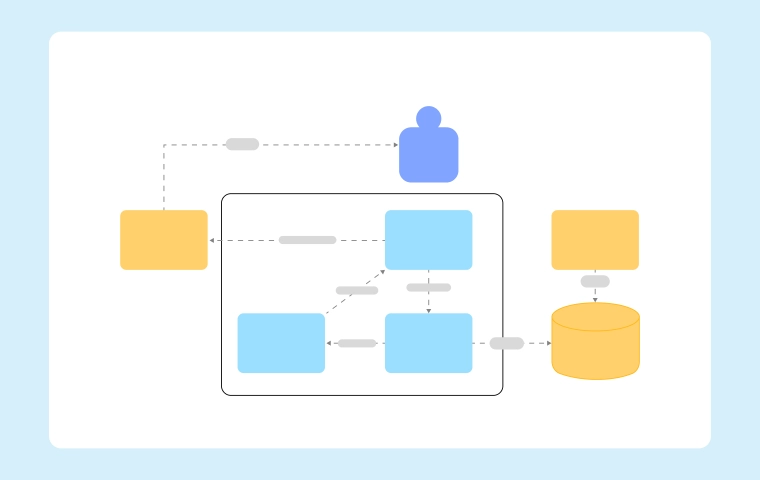
A clear Git workflow diagram turns branching strategy into shared, enforceable practice. It reduces friction, supports automation, and keeps releases dependable—even as the team scales.
Build yours today with the Git Workflow Diagram Template inside the Workflow & Process Diagram Maker, and explore the broader context in the Workflow & Process Diagrams Guide.

Ready to create smarter with AI?

Start using Cloudairy to design diagrams, documents, and workflows instantly. Harness AI to brainstorm, plan, and build—all in one platform.

Recommended for you
Using Flow Diagrams in Agile Teams
Technical Diagramming